


Help Center

Nothing found
How to add a project?
In order to add your project, you need to register in the CryptoCloud dashboard. On the main page of your dashboard, you will find a step-by-step guide to get started. Click on the "Add Project" button and fill in brief information about your project. Follow the prompts above the fields.
We recommend watching the video tutorial on the right side of the page, which explains the process of connecting and using the service
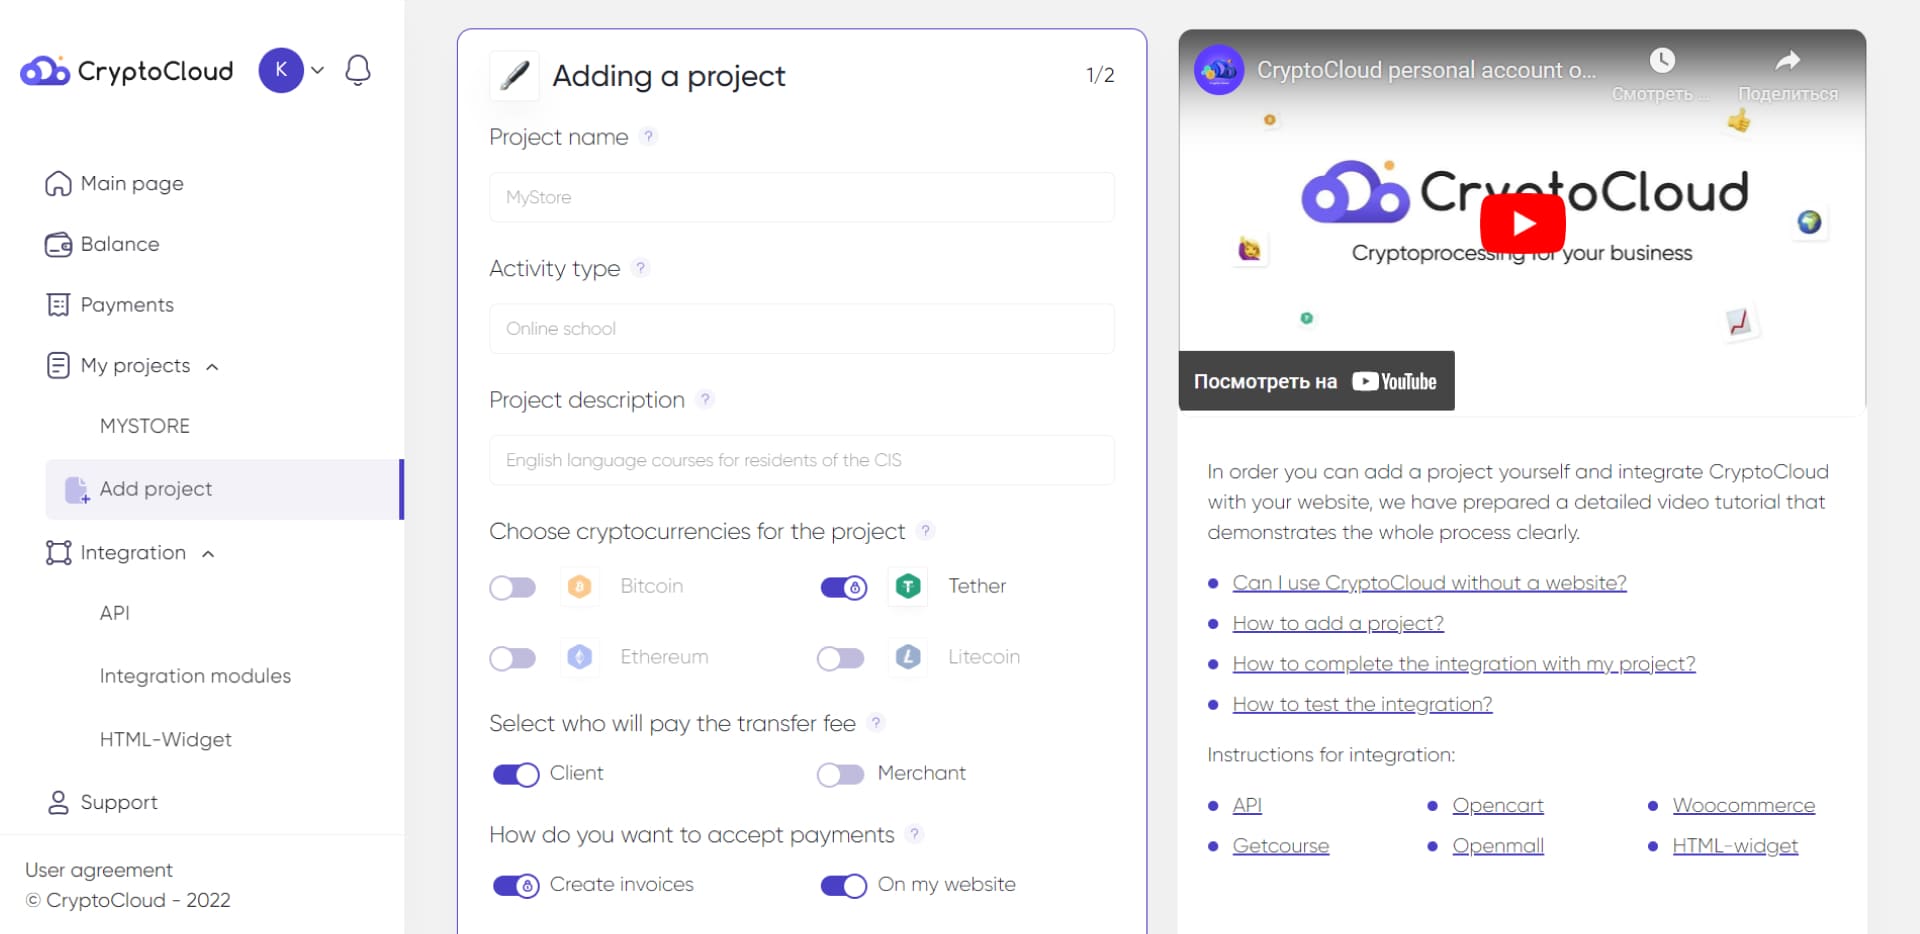
- Project name — this will be displayed in your dashboard, our system, and on payment invoices for your customers.
- Type of activity — the most appropriate designation for your activity (online store / online school or course / service or platform / aggregator / Telegram bot, etc.).
- Project description — description of your project (niche / products or services, target market).
- Select the required cryptocurrencies / payment methods. After adding the project, you can also add new ones and disable unnecessary ones.
- How do you want to accept payments? You can use the service without a website by manually creating payment invoices. If you choose «On my website», you will be able to integrate with the service.
Click the "Next" button to proceed to the second step of adding your project
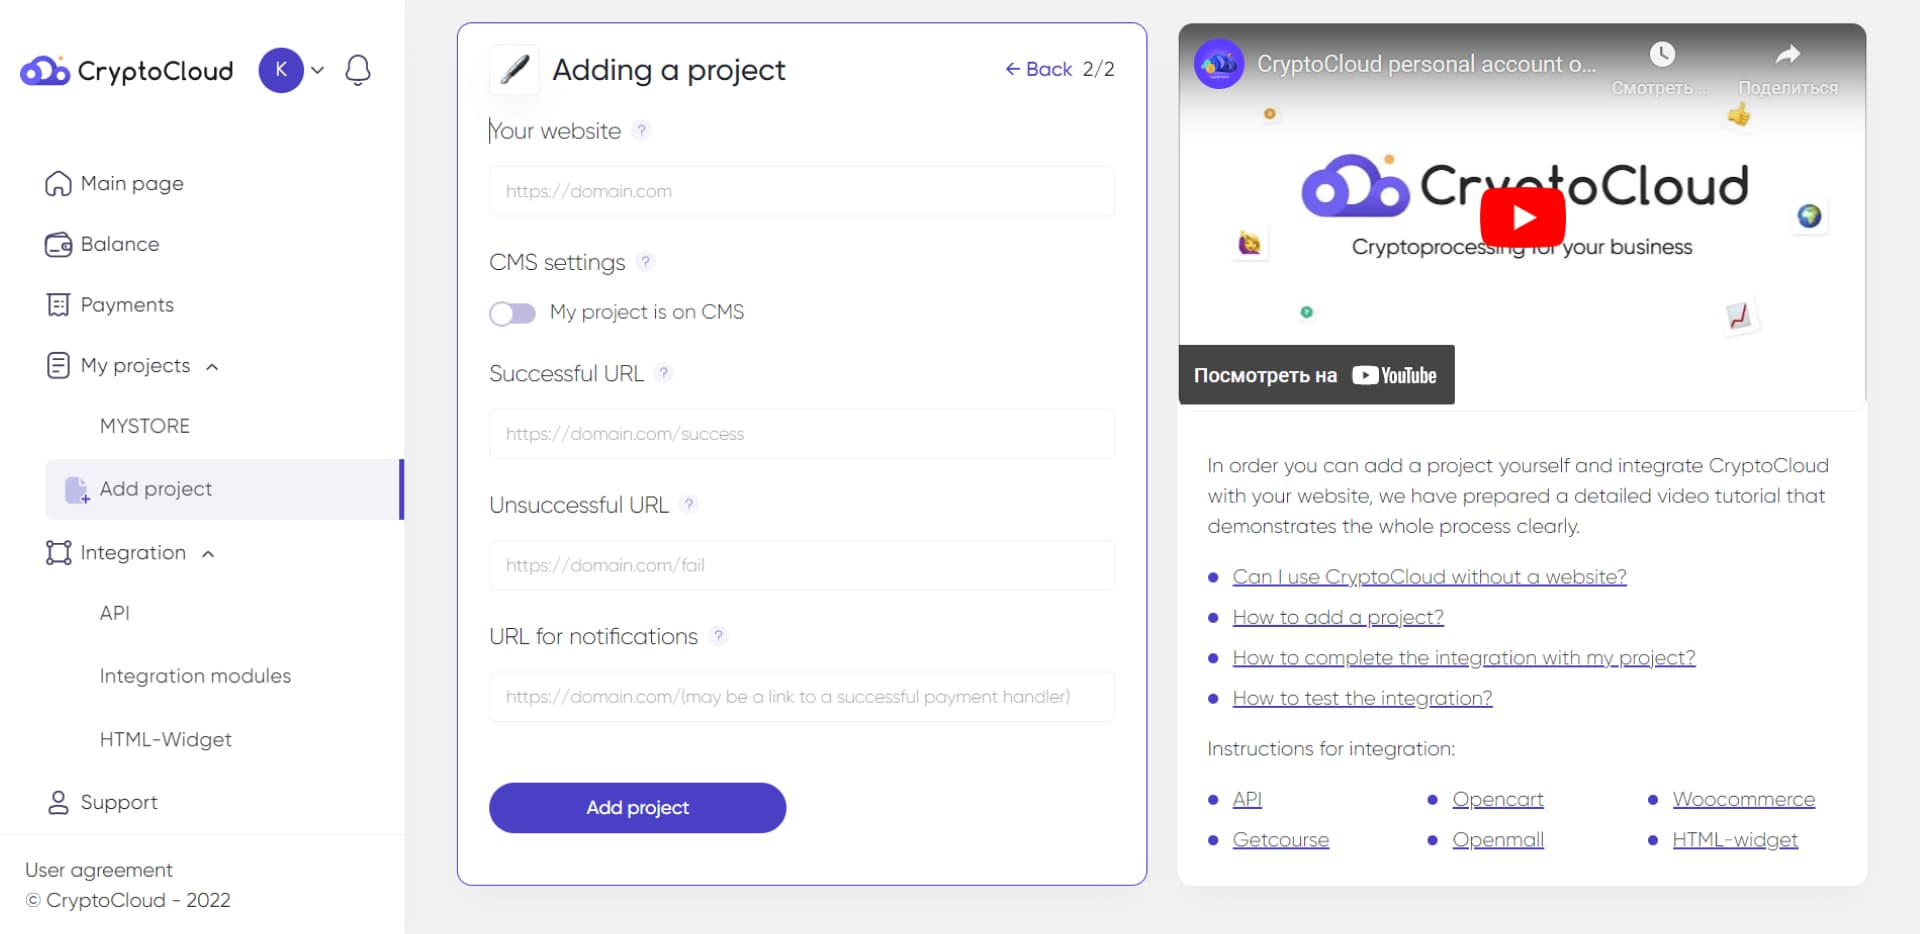
- Your website — link to the website where you want to accept payments. Example: https://domain.com/.
- CMS settings — if your website is built on one of the provided platforms, select it from the dropdown list, and some fields will be pre-filled.
- Successful URL — link to the page where the user will be directed after a successful payment. Example: https://domain.com/successful-payment.
- Failed URL — link to the page where the user will be directed in case of an unsuccessful payment. Example: https://domain.com/failed-payment.
- Notification URL — link to a page in your system where notifications about events will be received. Notifications are used when interacting via API and allow you to automatically track and transmit transaction statuses to your website or service. When connecting via CMS modules, the necessary values for input can be found in the respective instructions.
After filling in all the fields, click the "Add project" button. When adding a project with a website, you will receive an API key and Shop ID for further integration.
After adding, the project automatically enters a test mode, allowing you to test the integration. You can disable the test mode in the list of all projects.
The information about the changes you can make to the project settings after adding a project has been provided in the section.
If needed, you can disable a project without deleting it.
Was this answer helpful to you?